
Creating a website for your business is now easier than ever.
You don't need to be overly technical to create a really visually appealing site. Tools like Squarespace allow you to create a really slick website with an easy drag and drop layout.
Although Squarespace has plenty of ecommerce functionality it's better suited to business that aren't selling their products through the website (restaurants, professional services, portfolios etc). If you're website is going to be heavily focused around purchasing products through the site I would recommend checking out Shopify instead.
One of the great things about building your site on Squarespace is that you can create a free trial and work on the site two weeks before you ever have to pay for it. If you change your mind, you can also abandon the site without being out of pocket.
I recently created a website using Squarespace for a friend and wanted to share my step by step guide to how you can too.
Step 1: Get Some High Quality Photos In Landscape Orientation
Before you even get into creating your site get some high quality photos that you can use. Having a pool of photos ready will speed up the process of creating your site immensely.
Landscape is preferable because if you consider a website layout a lot of the image that you'll use will be horizontally aligned to go across the site.
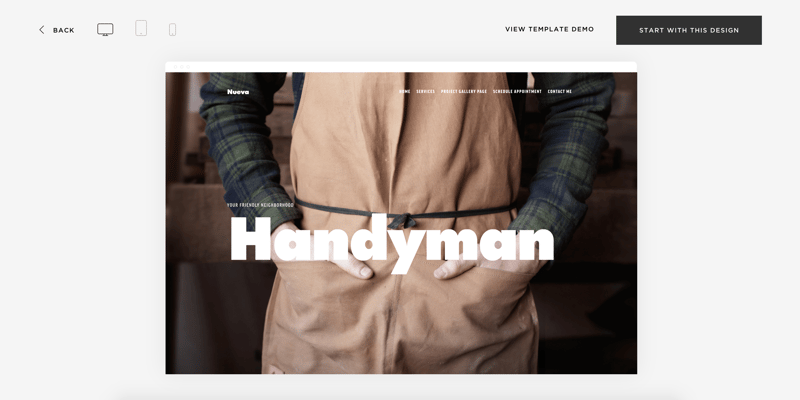
Step 2: Choose a Website Template
Choose a website template from Squarespace, there are tons to choose from and they're broken into handy categories so you can choose one that best suits your business:
Step 3: Start Customising Your Template And Adding Pages
First you'll be asked to name your site and give it a description. Depending on the template you've chosen this description may or may not be featured on the site.
Choose the 'pages' option on the left hand side of the screen and you'll see all the pages that make up this template, each with the word 'demo' beside them:
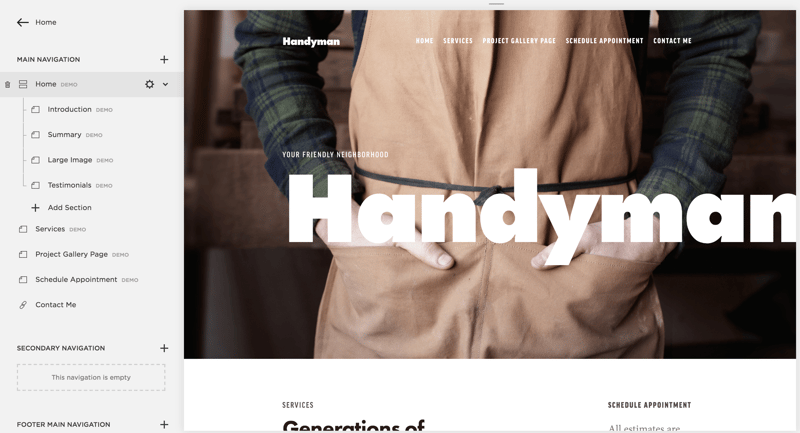
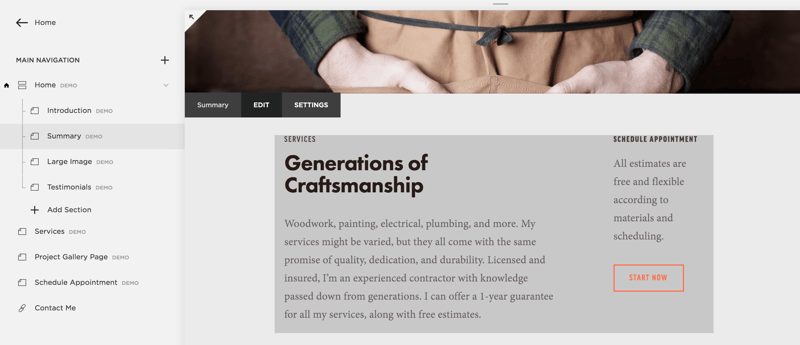
Clicking on a page name on the left side brings you to this section of the website. If you decide you'd like to add this section to your site, click edit you'll get a message informing you that this page is currently a demo needs to be created before you can edit it.
Hit 'create' and you can begin changing the text, buttons and layout of your newly added section.
The design option on the main menu allows you to change elements like colours, borders and custom CSS. However, because the templates are so stylish and intuitive I would recommend staying out of this section altogether.
Step 4: Add A Domain Name
You'll have noticed by now the web address for your website is a gibberish domain known as a staging domain and may look something like: 'firstname-lastname-2j7k.squarespace.com'.
Once you've finished editing your website you can add a real domain so that your website can be found by search engines and accessed by the public.
You can either go to 'Settings' on the main menu and select 'Domains' to purchase and connect a domain from Squarespace or you can purchase a domain from an external provider and connect it. The latter option may be more cost effective but requires a little more technical set up which can be a bit daunting if you aren't familiar with DNS settings. If you decide to go for this option, I would recommend using GoDaddy.
Remember this will be your website address so make sure you choose one that fits your business well.
Step 5: Choose Squarespace Payment Package
Finally now that your site is finished I assume you're going to want to keep it!
You now need to choose a payment package to take your website from a free trial to the real deal.
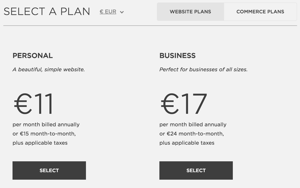 Again this is where Squarespace favours those not taking transactions through their site as the personal package will allow you to do pretty much what's needed from a small business site.
At the moment of writing this the personal package costs just €132.00 for the year but you should carefully assess what each package offers and ensure that you're not missing anything you'll need.
Squarespace also provides a guide for choosing the right plan if you're still not sure which package you'll need.
And that's it, you now have yourself a website for your business. If you've given this a try and finding it difficult, let me know in the comments below and I'd be happy to help.
Also be sure to check out my full resource on starting your own business if you need information on any part of becoming a business owner.